Showing posts with label XNA. Show all posts

Sunday, December 27, 2009

Procedural Cities in XNA

It's been quite a while since I've talked about any development I've been doing. To be honest I have been quite busy with work and flight lessons, so I don't have much time to work on my hobby projects.

Lately I have been working on a procedural city generator in C#/XNA. I'm basing my work on the Metropolis project, which was in turn based upon a research paper presented at SIGGRAPH 2001.

I began with the procedural road map generator. It takes a heightmap and generates a road network from it.


Zooming in you can begin to see the subdivisions between streets where buildings will be built.


Zooming in even further makes the building lots even clearer.


Next, I began work on the 3D building creation. Here you can see many simple buildings all using the same texturing.


I then added more texture variety.


I finally added in the terrain with road texturing.


Zoomed out view showing the vast number of buildings generated.


And the final image showing "Central Park" (this city was generated from a heightmap of Manhattan).


I want to eventually release the source code for this, but first I need to clean up the code some more. I also need to tweak the renderer to run faster. Right now it is just brute forcing it, and doesn't utilize any form of level of detail or frustum culling.

Wednesday, July 29, 2009

Infinite Depth Buffer

I've been planning out how I'm going to rewrite my planet algorithm once DirectX 11 is out. I've decided to focus on problems I have now that will still be a problem in DX11. One such problem that I've always been having in the past is the depth buffer.

My planet is Earth-sized so in order to keep it visible as you fly away from it, I pushed the far clipping plane way out. Obviously this destroyed the precision of my depth buffer and I had big problems with Z-fighting (far off mountains were being drawn in front of closer ones).

Rant: Why the heck are most GPUs these days still stuck with a 24-bit depth buffer? The Xbox 360 and my GeForce 9800M GT both only support up to a 24-bit depth buffer. DX11 level GPUs will have 64-bit floating point (double) support in shaders, so why not a 64-bit depth buffer?

In the videos and screenshots I have posted in the past, I did two different things to try and fix my problem with the depth buffer. First, I had a "sliding" far clipping plane that would have a minimum value, but as you flew away from the planet, it would extend out in order to continually show the planet. My second solution was to just disable the depth buffer. Both of these solutions only worked because I was drawing only 1 planet and there were no other objects being rendered. Obviously I want to keep my depth buffer around, keep the high precision for any near objects, but continue to draw far off planets (not have them clipped by the far clipping plane).

In order to fully understand my problem, I read about how exactly the depth buffer works and how a position is transfomed and then clipped. I found this article very informative about the inner workings of the GPU in terms of the depth buffer. I did not change my depth buffer to be linear like he does though. The article helped me to understand the relationship between the Z component and W component of the transformed vertex position.

Between the vertex shader and the pixel shader, the Z component is divided by W in order to "normalize" the depth (range 0-1). If the Z value is greater than 1 then it is clipped. So, I needed to make it so that the normalized Z value never exceeded 1. This was a very simple thing to fix, once I understood it. In my vertex shader I check the Z value to see if it is greater than the far clipping plane value (which I pass into the shader). If it is greater, then I simply set the W component equal to the Z component. This means that the Z / W calculation thus becomes Z / Z = 1. Now I can have good depth buffer precision for things close to the camera, but I will continue to draw things even if they are an infinite (theoretically) distance away!

Obviously this solution isn't perfect and there are some "gotchas". If I am drawing a planet and a moon, and the moon is behind the planet, and I am flying away from the planet, AND the moon is being drawn after the planet in the C# code, then the moon will suddenly pop in front of the planet once the planet exceeds the far clipping plane. That means I'll have to have a manager of large objects in the "local system" to make sure they are drawn in back to front order. That should be really easy to implement.

Hopefully this all makes sense and it helps someone else struggling with the same problem.

Until next time...

Update: I would now strongly encourage people to use a Logarithmic Depth Buffer to solve all of your depth buffer precision issues. You can read about it here:

Sunday, May 31, 2009

Perlin Noise on the GPU

I've written a tutorial on how to implement Perlin Noise in both a pixel shader and a vertex shader. The tutorial is available over at Ziggyware.

http://www.ziggyware.com/readarticle.php?article_id=246

Check it out! I welcome any feedback.

UPDATE
http://www.ziggyware.com/news.php?readmore=1125
I found out I have won first place in the Ziggyware contest! I'm very happy that my first XNA tutorial was such a success. Perhaps I will write up more in the future.

UPDATE 2
It appears that Ziggyware no longer exists, so I have shared the article, screenshots, and sample code on my server.  You can download it all here:
http://re-creationstudios.com/shared/PerlinNoiseGPU/

Sunday, April 19, 2009

Boxes, Cylinders, and Spheres (Oh My!)


After deciding to use PhysX in combination with DirectX 11 last week, I thought about how I would go about drawing simple 3D shapes. In the samples and lessons, PhysX uses GLUT with has some shape drawing functions built-in. While DX9 has similar functions, neither DX10 nor XNA do. I believe it is safe to assume that DX11 will not have them either. I can understand why they were removed. They don't really make sense anymore in a programmable pipeline system. What is the vertex format of the shape created?

While most people these days get around it by creating a mesh in a 3D modeling application and then importing it into their game, I prefer to have my simple 3D shapes constructed programatically. This allows me to easily change the detail of the mesh without worrying about exporting/importing an entire new model.

Instead of implementing it in DX10 and C++ first, I decided to implement it in XNA. This allowed me to focus on the algorithms themselves and not have to worry about any C++ issues getting in the way.

My initial implementation was a static class that had static methods in it that built the shapes and returned the vertex buffer and index buffer. This worked well, but I thought it still placed too much burden on the user to remember how many vertices they had just created and how many triangles they were going to draw.

In order to make things simpler, I changed it to be a normal, instantiated class that contained the static methods that created an instance of the class. This allowed me to store the vertex count, triangle count, as well as the buffers in instance properties in the class. I even threw in a Draw method to make it incredibly simple to use the generated shape.

Because this is such a basic, fundamental class that can benefit several people ( have seen various people requesting something like this), I have decided to share it with the public.

You may download the C# file from here:
http://re-creationstudios.com/shared/Shape3D.cs

You can also download the entire test project here:
http://re-creationstudios.com/shared/ShapeTest.zip

To use, simply create a shape using one of the static methods:
Shape3D sphere = Shape3D.CreateSphere(GraphicsDevice, 1, 12, 12);

To draw, in your Effect block, call the Draw method on the shape:
sphere.Draw(GraphicsDevice);

The Create methods are made to follow the same structure as the DX9 shape drawing functions. You can read more about those here:
http://msdn.microsoft.com/en-us/library/bb172976(VS.85).aspx

Sunday, April 12, 2009

Tactical RPG

I've been engrossed with learning about DX11 lately. I've looked at slide presentations, listened to audio recordings of speeches, and read various articles discussing the new features being introduced. I believe it's a great understatement to say that I'm excited about DX11. I've finally come to the conclusion that once I have a DX11 GPU, I'm going to rewrite my procedural planet code using DX11.

In the meantime, I've decided to take about 1 month to implement a prototype for a tactical RPG I've been thinking about. I started about 2 weeks ago, and I plan to finish it by the end of April. One of my main goals is to have it completely mouse driven so that it can be played on a tablet.

I believe it is coming along rather well. I have a really nice 2D camera set up that behaves similar to Google Maps. You can use the mouse to drag around the view and you can zoom in and out using the scroll wheel. I have basic movement and attacking implemented as well. I even have one of my graphic designer friends making up some art for me. Overall, it should shape up to be a pretty decent prototype. Maybe I will even release it to the public, source and all.

PhysX

New content for Banjo-Kazooie: Nuts & Bolts was released last week. As a result, I pulled out the game again and played it some more. I wasted several hours just messing around with the vehicle editor to make various contraptions. I started thinking about how much fun it was to just tinker around like that without really following any goals, and then I started wondering about how hard it would be to implement a similar system myself.

Almost 4 years ago, I had implemented a "domino simulator" using what was then known as the NovodeX physics engine. It is now known as PhysX, is owned by Nvidia, and has hardware acceleration. So, I downloaded the SDK and played around with some of the samples.

First, the good. I was simply astounded by how many samples were provided in the SDK. There are 37 samples and 89 "lessons", all with documentation. It is amazing. Plus, the hardware acceleration really helps speed the physics engine up. One of the samples was getting about 40fps in software mode and 130fps in hardware mode. That was on a 9800M GT.

The bad is more about C++ than PhysX. I decided to create a C++ project from scratch and then add all of the libraries and code necessary to get the first lesson from the SDK working. It was horrific. It took me 3 hours to get everything to compile and run. In the end, here is what was in my project:

5 include directories
3 static libraries
- added to both the project and VS itself
- had to add one directly to solution to get to compile
12 include files (separate from the include directories)
8 cpp files
1 dll

Remember, all of that was to run the FIRST lesson, which is just three shapes on a plane. In C#, it would have been 3-4 DLLs and one CS file. As I said, this is more of a complaint about C++ and not PhysX. I forgot how tedious it was to setup a project for the first time. I do plan to stick with PhysX though, because once I do port my procedural planet code over to C++/DX11, then I will want a nice physics engine to go along with it, and it might was well be the only one with hardware acceleration.

Until next time...

Wednesday, March 18, 2009

Craters

Another quick update. I have been working on adding craters to the procedural moon. I implemented a Voronoi diagram shader in HLSL and then I tweak it with quite a few different parameters to generate conical pits that are distorted slightly with fBm noise.


I tried for quite a while to get rims around the edges of the craters, but I couldn't get it to work. I tried using a colormap to alter the Voronoi results, but I was having issues with the it. I will continue to tinker around with it because I think having rims would add quite a bit.

Interesting fact: If I add even more fBm noise to the crater distortions, it forms pretty cool canyons:

Tuesday, March 3, 2009

That's No Moon ...

Quick update. First, I switched to more "moon-like" textures.


Then, I tweaked some of the parameters to my existing noise function.


Finally, I started messing around with sums of two different noises.


Here's a detail shot showing the "better" noise at the surface.


There's a lot more work to do!

Thursday, February 19, 2009

Fixed Lighting + Higher Res

As I mentioned in my previous post, I was getting some strange vertical lines appearing in my deferred lighting result. After I turned down the ambient light to make the lighting a bit more realistic, the lines became even more pronounced.

Casting that problem aside for a bit, I decided to increase the resolution because 800x600 just wasn't cutting it anymore. I went with a widescreen resolution because both my laptop and my desktop have widescreen screens. I settled on 1280x720 because 1920x1200 would just be overkill right now, in my mind.

The problem with increasing the resolution was that the lines got even worse! Now I was getting horizontal lines as well as vertical lines, so it looked like a big checkerboard mess. I spent several days trying to figure out what was going wrong. At first I thought it was a bad driver/GPU in my laptop. So, I went to test it on my desktop, but I found out that my power supply was dead. Luckily my brother let me remote into his PC and run the app. I got the exact same results, so I knew it wasn't my GPU. I then installed FX Composer to have a better debugging IDE. I soon discovered that I was using wrong texel offsets to sample neighbors in the world position texture. This removed the lines from FX Composer, but they were still appearing in XNA. I was messing around with my sampler filters when I finally fixed the problem by switching them from Point to Linear. While it does get rid of the lines, it comes at a cost. I am now getting about 18fps average. Obviously the change in resolution also figures into that as well.

I have some interesting new screenshots to share.


Sunday, February 8, 2009

Deferred Lighting

This weekend I implemented a lighting system like the one I talked about in my last two blog posts. I'm calling it deferred lighting because it doesn't do any lighting calculation until I have render targets for the scene. I have one render pass that has two targets: one containing the diffuse color of the scene, and the other containing the world position of each pixel. In a second render pass, I calculate the normal of each pixel by sampling it's neighboring pixel world positions. I then simply do a standard lighting calculation using the normal and the diffuse color of the scene.

It also has much better performance compared to the brute force 32 noise calculations method. At low altitudes I was getting 16fps with the noise method and 33fps with the deferred method. At high altitudes I was getting 12fps and 30fps, respectively. As you can see, I was getting at least double the framerate all the time.

Now for some pretty pictures. They are not much different from my previous lighting pictures, the important thing is that they are being rendered much faster now. I also fixed a slight bug I had in the previous lighting that made the light direction the same for every side of the planet (there was no dark side). There are some strange vertical lines that are appearing which you can see in some of the screenshots below. I'm not sure why they are there, but I will continue to investigate them.


In the last picture you can see the detailed designs that are being generated for the terrain itself. Just to show a difference between the lit vs diffuse renderings, here is the diffuse texture alone for the last picture.

Thursday, February 5, 2009

Per Pixel Normal Calculation

Sorry, still no actual code or pretty pictures!

I just wanted to write up a quick note related to my second topic in my previous post. I did some Googling to see if any other people have implemented a similar system and indeed some people have. In fact I found an article by Microsoft that describes exactly what I was talking about.

http://msdn.microsoft.com/en-us/library/cc308054(VS.85).aspx


In the article, they are creating procedural materials dynamically, so they have to calculate normals dynamically as well.

From the article:
"One solution is to run the shader multiple times and compute the difference in height at each sample point. If we calculated the height one pixel to the right of the currently rasterized pixel and one pixel above the currently rasterized pixel, we could compute tangent and bitangent vectors to the central pixel. Doing a cross product on these would give us the normal for that point."

What I found funny is how they start talking about the ddX and ddY functions in HLSL but in the end they still use the render target + second pass method.

"The solution that this sample uses by default is to render the perturbed heights of the objects in the scene into an off-screen render target. That render target is then read back in on another pass. For each pixel on the screen, its right and top neighbors are sampled. Tangent and bitangent vectors are created from the neighbors to the central pixel. A cross product between these will give the normal."

I now feel very confident about this method of doing things and I will proceed to implement lighting in this manner. I will probably branch off of my existing planet codebase so I can easily compare the differences between the brute-force noise calculation vs the "deferred" style.

Tuesday, February 3, 2009

Hello 2009!

I just realized that I never wrote an entry for January. It's the first month that I have not had an update since I started this dev blog. To be honest, I didn't have much to report. I haven't really written any code but I have been thinking about a lot.

At first I was thinking about physics. I thought it would be nice to actually have collision detection with my terrain and possibly throw balls around or maybe even drive a car. However there was a big problem with this. How do I detect collision with a mesh that is deformed entirely on the GPU? Obviously I would have to have some way of sending the physics data to the GPU, do the collision detection there, and then somehow pass the resultant data back to the CPU.

Getting the data to the GPU is the easy part, I think. If I only use bounding spheres for all of the objects, then I can simply pass one normal Color texture to the GPU containing the position of each sphere in the RGB and the radius of the sphere in the Alpha. It may even be possible to set a constant memory buffer (ie array) with the data, which would be even easier.

Once I have this data, I can run through each object in the vertex shader to see if it collides with the current vertex. The problem I ran into then is I don't know how to get the data back to the CPU. I would obviously want to write the data to a render target. Unfortunately, the collision data is in the vertex shader. Pixel shaders cannot index into memory in XNA/DX9/SM3.0. [In DX10/SM4.0 they can index into constant memory, in DX11/SM5.0 both the vertex and pixel shaders can read and write to dynamic resources.] I have no idea how I would pass the data from the vertex shader to the pixel shader.

That means I must somehow do the collision detection in the pixel shader. However, this means that I will be doing the checks for every object, for every pixel. That will be massive overkill. I couldn't come up with a good solution, so I pretty much gave up on physics for now. It should be a cinch in DirectX 11 and Shader Model 5.0!

The next thing I was thinking about was mainly efficiencies. Currently I am calculating the normal in the pixel shader by doing 32 noise calculations per pixel. This is quite a strain on the GPU. I was reading an article about deferred rendering and I had a thought. If I only output the height of each pixel to a render target, then I could have another pass that reads the neighboring pixels in the render target into order to calculate the normal. This means it would one pass that does 8 noise calculations per pixel and then a second pass that does 4 texture lookups per pixel. I imagine that would be a much faster way of doing things.

I have yet to actually implement anything though. So everything here is just speculation. Sorry for no pretty pictures. I will try to get something worth showing off sometime soon.

Monday, December 22, 2008

Starfields & Nebulas

Instead of focusing on craters (which I implied I was going to do last time), I decided to look into generating starfields and distant (ie 2D) nebulas.

I started on simple starfields and I had a working solution in less than an hour by simply drawing star sprites in random positions.

This yields the following result:


Next, in order to make the stars more interesting, I looked into implementing nebula clouds. I knew that some summation of Perlin Noise would be the best solution. So, I decided to implement a Perlin Noise function in C#. I have a really fast implementation in HLSL, but I wanted the full power of breakpoints and variable watches. I ended up using a standard fBm summation with an exponential filter applied to it.

This helped to produce this nebula cloud image:


I still need to blend these two results together and construct them into a decent cubemap.

World of Warcraft + 360 Controller

All of that work done on the starfields and nebulas was done a couple weeks ago. My co-workers recently pressured me into playing World of Warcraft again. (About 6 months ago, I got up to level 18, and then quit.) As I was playing I kept thinking about how bad the controls were. I was moving my hands all over the keyboard to use all of my skills. It was fine for just grinding along and completing quests, but grouping and duels I always performed horribly. I desparately wanted to play with a game controller, however World of Warcraft didn't support them. There were a couple of applications that other people had written to allow gamepads, but I didn't care for them either. One was very ackward and built up macro commands that you had to then "submit" by pulling the right trigger. Another one seemed decent, but it had a subscription fee of $20 a year.

I decided that if I wanted something done right, I had to do it myself. So, I threw together a quick XNA application that read the 360 controller input. It would then use the Win32 function SendInput to place keyboard and mouse input events into the Windows input queue. I mapped out all of the controls and I was then able to play World of Warcraft using a 360 controller! I can target enemies, target allies, use all 12 skills on the current action bar, switch action bars, loot corpses, and even move the camera with full analog control using the 360 controller! It has completely changed the game for me and I even won my first duel last night.

I have now taken the app and added in mappings for Call of Duty 4 for my brother. I'm planning on converting the project to be more generalized so that the input mapping can be defined in XML and easily changed without recompiling.

Thursday, December 4, 2008

Lighting Revisited (AKA I'm Back!)

So, after almost 3 months of being sidetracked with various other projects I came up with, I finally decided to come back to C# and XNA with welcome arms.

And I have come back in a big way, in my opinion. After discussing it with one of my friends, I decided that it would be best to procedurally generate a moon instead of a planet. This greatly simplifies many things; no atmosphere, no fog, no water, no vegetation, etc. However, this meant that I needed to figure out how to properly do two things: generate craters and have realistic lighting.

You may recall that I had a previous blog entry about my attempts with realistic lighting. [http://recreationstudios.blogspot.com/2008/07/do-you-see-light.html] In the end, I determined that it would be too difficult to do now, and easy to do in the future once I had geometry shader support. So, I had settled with simple spherical lighting across the entire planet.

So, it took me quite a bit of effort to even start looking at alternative ways to render realistic lighting. In the past I was trying to calculate the other two vertices of the triangle in the vertex shader. It was with a great facepalm that I realized that what I was trying to find was the tangent of the surface and then I could use that to adjust the spherical normal. Well, as you may remember from your math classes, a tangent is calculated by taking the derivative of the original function. So, I looked into quite a few articles about how to find the derivative of a Perlin Noise function.

This article was very informative, but I wasn't quite sure on what speeds would be on the GPU:
http://rgba.scenesp.org/iq/computer/articles/morenoise/morenoise.htm

Finally, I found an article by Ken Perlin himself that shows how to approximate the derivative:
http://http.developer.nvidia.com/GPUGems/gpugems_ch05.html (Section 5.6)

With this little nugget of knowlege I went into my shader and wrote a function to do exactly that.

float3 NoiseDerivative(float3 position, float e)
{
//calculate the height values using Perlin Noise
float F0 = ridgedmf(position*noiseScale, 8);
float Fx = ridgedmf(float3(position.x+e, position.y, position.z)*noiseScale, 8);
float Fy = ridgedmf(float3(position.x, position.y+e, position.z)*noiseScale, 8);
float Fz = ridgedmf(float3(position.x, position.y, position.z+e)*noiseScale, 8);
float3 dF = float3(Fx-F0, Fy-F0, Fz-F0) / e;

//calculate the actual normal
return normalize(position - dF);
}

Then I simply added a call to this function in my pixel shader:
input.Normal = NoiseDerivative(input.Normal, 0.000001);

Lo and behold, it worked!

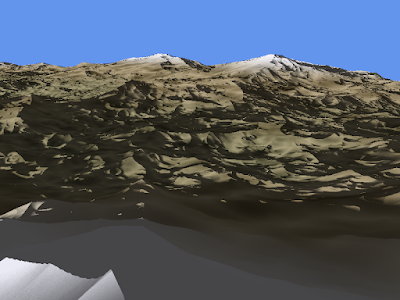
Check out the pics:

Sunday, September 14, 2008

Switching Gears

So I was chatting with one of my friends about what was up next on the todo list for my procedural planet. I explained that I was working on fog and that after that I would focus on water. He suggested that I get HDR and Depth of Field put in next. I then mentioned how I want to get Atmospheric Scattering in as well.

With all of these features laid out, the project seems rather daunting. That is easily several months worth of work right there. (I still do have a full time job!) I started thinking about how to make it easier, yet still make it stand out. I mean no matter how many awesome looking things I put in, I will never even come close to the level of Crysis. I am only one guy! So, I decided I should focus more on something that would be feasible for a team of one to accomplish in a lifetime.

Time for a personal history lesson!

Back when I first started fiddling around with XNA (over 2 years ago now), I also started looking into shaders for the first time. I have always been interested in Non-Photorealistic Rendering (cel shading, painterly rendering, hatching, etc), so I thought that might be a good subject to test with shaders. In my research, I came across a great paper about doing real-time pencil sketch rendering. http://cg.postech.ac.kr/research/pencil_rendering/

In January 2007, I began work on my own pencil shader. I actually started with 4 separate shaders that would require all models to be rendered 4 times. Fairly quickly I realised that I could speed things up greatly by having 1 shader with 4 passes. I tinkered around with it, and other things, for several months before I found out about using multiple render targets. Using this, I was able to get it down to 3 passes. Not long after that, I demoed the shader in a job interview and I actually got a job as an XNA Game Developer! That job lasted until the company got bought out by a larger company. Toward the end of my employment there, I started getting into procedural generatation, and that's how I came to have the procedural planet that I have today.

As you know, I have a new laptop now, and during the transfer of files from my old laptop, I saw my old pencil shader again. It had gone untouched since the day I demoed it in my job interview. Yesterday I finally decided to take all of the code and update it to XNA 2.0 and clean up what I could. I realized that I had learned quite a bit over the last year about both XNA and C#, so I was able to make the code much cleaner. Not only that, but I was also able to get the shader down to 2 passes! This gave me a 100fps speed boost. (On my GeForce 9800 GT, the 4 pass = 470fps, 3 pass = 480fps, 2 pass = 580fps.)

This has really given me a desire to work on NPR stuff again. So, currently my next goal is to have a procedural planet that is rendered using my pencil shader.

Tuesday, September 2, 2008

Procedural Texturing

Well I am now producing what in my opinion are decent procedural textures for the planetary terrain. They are generated per pixel every frame. This has the advantage of allowing infinite resolution as well as eliminating any texture coordinate warpings around a sphere, since the textures are actually 3D.

As I mentioned before, this does require a significant performance hit. I have managed to simplify the texture generation to the point of having reasonable framerates while maintaining decent texture quality. What I am doing is calculating 4 separate textures using 2 octaves of turbulence noise at different scales for each one. These 4 textures represent sand, grass, rock, and snow. They are then blended together based upon the terrain height to generate a final texture.

I am getting anywhere between 25-50 frames per second depending upon how many pixels of the terrain are taking up the viewport. The average for normal travel is 35 frames per second.

Here are some screenshots of the results.

Monday, September 1, 2008

New Laptop, New Opportunities

It's been awhile since I've written an update. As expected I got slightly side-tracked by Too Human, but what was an even worse offender was Mass Effect. I picked it up at a sale at Toys R Us, and I became addicted to it. I am currently working on my third playthrough of the game.

I finally received my new laptop 3 days ago. I haven't had much time to do programming on it because I had to first install all of my desired applications, transfer all of my files from my old laptop, and then prepare my old laptop for my sister.

I did manage to run a "benchmark" on the new laptop though. In the past, I wrote an XNA app that generates a texture using Perlin Noise in a pixel shader. This is usually a good evaluator of a GPU's performance. Here are some specs:

Generating 12 octaves of 1024x1024 3D fractional Brownian motion Perlin Noise:
8600 GT ~20 frames per second
9800 GT ~80 frames per second

Yep! My new laptop's GPU is 4 times faster than my desktop! Just to put a little perspective on it, these results mean that my new GPU was performing over 1 billion perlin noise calculations a second!

I also started fiddling around briefly with generating procedural textures for the planetary terrain. My idea was to use 4 different noise calculations per pixel and then blend the results together based on the planetary height of the pixel. As expected though, there was a severe penalty for doing a noise calculation per pixel. I never did get up to 4 calculations. Here are my initial findings, on my 9800 GT of course!

~120 fps using 4 existing textures
~40 fps using 1 8-octave ridged multifractal per pixel
~30 fps using 2 8-octave ridged multifractals per pixel

The performance hit is not linear though, so I expect that if I did 4 noise calcs, I would be getting about 20fps. However, that is on a 9800 GT, which is one of the best cards on the market now. Sure there are about half a dozen better cards, but how many people really have them?

I do have some ideas to potentially speed it up though. I could reduce the number of octaves, but then increase the scale. I could also try to make a fancy gradient so that I don't have to use as many different noise calcs.

Here are some screenshots showing different simple gradients using just 1 noise calc.

Sunday, August 10, 2008

Success!

I have completed the items on my to-do list!

I finally stopped the terrain from disappearing (for the most part ... I still had two instances where it happened). I discovered that I had a key subtraction backwards. How it even worked at all before, I will never know.

I got each terrain level to move at its own stepping distance by storing and updating a world matrix for each level. Luckily my CPU was hardly being used at all so I could easily spare the CPU cycles to do these extra calculations.

I fixed the gap between separate levels by simply making the square mesh slightly larger. Previously, the mesh would extend from (-1, -1) to (1, 1), but I updated it so that the range is (-1.25, -1.25) to (1.25, 1.25).

Now for what you've been waiting for: a new video. In fact this time I have two new videos for your enjoyment. One showing off the new terrain, and another showing it in wireframe mode.

Normal Terrain:


Wireframe:


On a separate note I just ordered a new laptop, so I will finally be able to do development on my laptop again. My current laptop only has a GeForce 6100, so it couldn't handle my shaders anymore (no unified pipeline). My new laptop has a GeForce 9800 GT which is about 20 times faster than my current GPU. It will be awesome!

Friday, August 8, 2008

Huh?

Well I beat Braid last night. I think it took me about 6 hours total to beat it. It's a very good game and I highly recommend it. That is, if you enjoy "action puzzle" type games (think along the lines of Portal). There are 60 puzzles in the game and I was able to do 59 of them myself. I couldn't figure out one of them and I tried it for an hour. I finally looked online and I learned about a dynamic of the game that I wasn't even aware of.

I had read a posting on the XNA forums about how matrix transformations can cause slight errors over time, so I added code after my transformations to renormalize the vectors and even recalculate the cross products in order to maintain orthogonality. However, when I fired up the program, the terrain was disappearing even more! The angle between the two vectors is still randomly coming up as NaN and Pi.

Sigh, well I guess I know what I'm working on this weekend.

Thursday, August 7, 2008

To-Do List

Here is a list of things that I want to get working before I create the next video:

- Fix disappearing terrain
- Make each level move at it's own step size (right now they all move at the smallest step size)
- Fix gaps between changing detail levels (you can see the gaps in the last screenshot I posted)

As for the disappearing terrain, in my previous post you will see that I've narrowed the problem down to the angle calculation. I've read the documentation on acos() and it says that NaN is returned as a result if the input parameter is < -1 or > +1. I'm passing in the dot product of what should be two normal vectors, thus the input should never exceed 1. Apparently I'm not sending in true normal vectors, so I'm going to add more normalization calculations, just to make sure they are coming out normal. That should remove the NaN results, but hopefully it fixes the Pi results as well. (I'm crossing my fingers tightly.)

I'll give it a try when I get home.

Wednesday, August 6, 2008

No real progress

I have been busy playing Braid, which is a great game that just got released on the Xbox Live Arcade. Therefore, I haven't really put much time into the procedural planet.

I did put in some code that would always display the calculated angle between the camera and the terrain mesh in order to see if that was causing the disappearing errors. I actually believe it is, although I'm not quite sure why.

First, I was surprised to see that probably a quarter of the time, the result was NaN. Even more surprising is that my terrain works perfectly even when the result is NaN.

The errors occur when the result suddenly comes back as pi randomly. I should never be getting an angle that big back. Heck I shouldn't ever be getting pi/2.

I will continue to investigate this problem (when I have time between Braid of course).